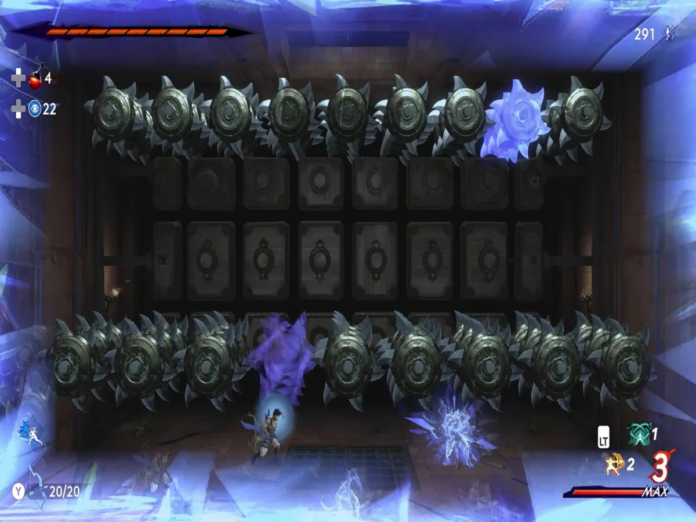
There are many difficult platforming rooms in Prince of Persia: The Lost Crown, but one optional challenge level may be the hardest you’ll come across.
A hidden floor halfway between the Lower City and The Depths is where you can already stop if you purchased the Lost Key from the Scrapper in his shop near to the Citadel Elevator in The Depths. You can now access the second portion of this accessible region as you can double jump.
After falling into The Depths during The Tiger and the Rat, you can initially visit the area of the Lower City where the challenge room is located. However, in the absence of a map, it is preferable to navigate The Path to the Sand Prison. This is the following quest.
Returning up The Depths, you will encounter a room housing the Citadel Elevator that returns you to The Haven. However, if you turn left, you will be able to chat with the Scrapper. Scrapper is a strange vendor who only accepts Xerxes Coins as payment.
Halfway between The Depths and the Lower City, there’s a secret floor. It can be unlocked with an Old Key that The Scrapper offers.
You can use it right away to find a Treasure Chest that has an Amulet, but the real test will come later. This challenge area will become available to you when you finish The Darkest of Souls main quest, but you won’t be able to double jump until you have the Gravity Wings power.
By utilizing the Old Key to return to the hidden floor via the elevator, you can activate the trap by jumping up to this little arena from the middle of the room using the pole.
You’ll face a sequence of spinning sawblade traps that come at you in a variety of ways, much to the one you had to face during Kaheva’s side mission to obtain the Ore.
Sawblade Challenge Room
The first series of traps is quite simple; it consists of moving sawblade columns that you must either rush between as they pass or wall-jump to the top.
Sawblades positioned equally on the top and bottom of the room will appear at the end of this segment and then swap positions.
Just stay still during this part as the trap will attempt to trick you by having the descending blades move at the last minute and finish exactly where the lower blades started.
In order to avoid getting attacked by the sawblades in the upcoming phase, you will need to use the Shadow of the Simurgh to construct a spot where you may teleport to before they cross the entire room in rows and columns.
Then more columns of spiked sawblades will emerge, with a few purple ones in the center. To dash past them, you’ll need to employ Clairvoyance while platforming. You’ll eventually have to begin switching between realities in order to make jumps.
You’ll ultimately have to begin switching between realities in order to make jumps. In order to teleport to the opposite side of them swiftly, construct a Shadow Point if no colored sawblades appear.
The dimensional sawblades will come more faster and closer together after the wall of sawblades you have to teleport through, so you’ll need to rush through most of them rather than jumping between them.
At last, the sawblades will begin to show up at the top or bottom in rows, closely spaced, with very few dimensional ones able to elude them.
Moving swiftly or preparing a Shadow Point to quickly shift from one side of the chamber to the other before they fully descend is advised, as only one sawblade in the entire row may eventually be avoided with Clairvoyance.
If you successfully go through the gauntlet in one go, a hatch will open at the top. You can rush beneath it and wall-jump to reach a Treasure Chest with a new Lilac Cosmetic Skin for Sargon at the top. Then, you can double jump up into the hatch.
Also Read: Top 5 PS5 Games Releasing In 2024


